It is assumed that you who would attempt the head balance on the trapeze have a working knowledge of the solo head balance, a bit of patience, and a special trapeze for the work. The ropes 8 to 10 feet long, and have some sort of gear to prevent the grommet from spinning around the bar, and to keep the bar from turning in the ropes. The sketch is a suggestion: a flat plate large enough to accommodate your grommet is bolted or otherwise attached firmly to the center of the bar, and provisions are made for fastening the grommet securely to the plate. The simplest way to solve the for-turning-in-the-ropes problem is to drill the ends of the bar and to pass a rod—say about 3/4 inch—through, with a nut on each side of the bar. Have the axis from 12 to 36 inches long, and bind them securely to the supporting ropes at top and bottom. (The apparatus in the photos is made that it can be suspended from two wires as shown, or hung from ordinary Roman rings by the hooks at the upper ends of the rods. If you chose this latter system, make certain that the ends do not bend and break where they pass through the bar—else a nasty fall will result. Likewise, be sure that the grommet plate cannot turn and spill you suddenly and roughly.)
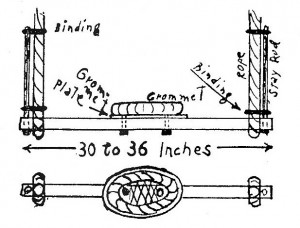
Some performers prefer a very heavy bar-30 or more pounds in weight—but I like a light one better. It is “faster” to be sure, but a good performer has better control on such a bar. Again use ropes of the same length all the time or at least until you are pretty much at home with (the bar) for the shorter the rope the quicker will be the beat of its swing; a difference of but a few inches makes an appreciable change in the “pendulum period” of the bar.
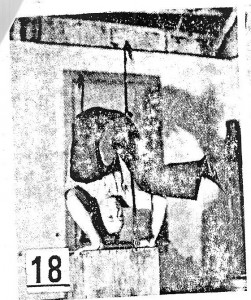
Position No. 18: Rig the trapeze just an inch or two from the floor; straddle the bar and press up as in figure 18 until you are in position with the head on the bar and the hands on the floor. Better still, use a pair of heavy dumb-bells or other solid objects for the first few attempts. Do not try a box as I am doing—this is dangerous until you can really perform this feat well, and much more so than the figures 19-20 mount. Practice near the floor until you feel really at home on the bar.
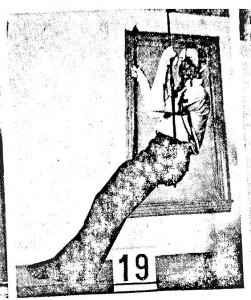
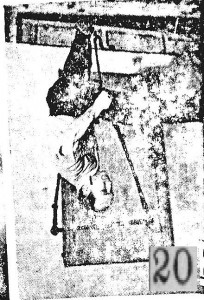
Position No. 19: To mount in the normal manner from the sitting-on-the-bar position, grasp the ropes with one hand in the normal grip and the other upside down, passing one leg through the ropes but NOT the other one.
Position No. 20: I originally grasped the farther rope with my right hand, thumb up, and the nearer rope with the left, thumb down, So upon inverting myself I pass the right leg through the ropes, but kept the left one on the original side, thereby straddling the near rope, held by the left hand. The original awkward position of the left hand is now strong indeed, permitting me to take my time and to place the head properly upon the grommet. It is much better to have strength and control at this position than at the start, Figure 19.
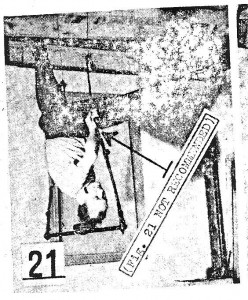
Position No. 21: Disregard this one; it is shown merely for comparison with figure 20. Some performers actually favor this normal grip with both hands—which is more natural while sitting on the bar. But once you get inverted you are in the awkward attitude of figure 21, and have much more trouble than in figure 20 in locating the grommet and placing your head on it. Of course, once you get fair control of the feat, you can vary procedure to suit yourself.
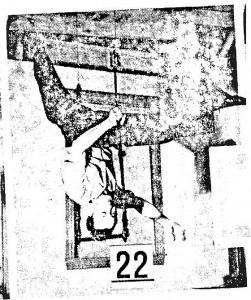
Position No. 22: Once the head is comfortably on the grommet after executing Figures 19-20, release the rear hand (my right one in the pose) and steady yourself with the other hand on the front rope while feeling for the balance with the legs and one arm; then gradually release the assisting hand and lower it to position.
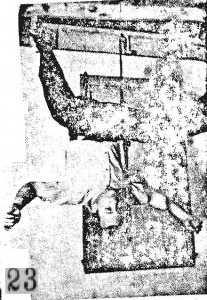
Position No. 23: The free head balance on the trapeze—surprisingly easy, I assure you. Balance by figure 7 method at first, using both arms and legs. Then place the hands on the hips.
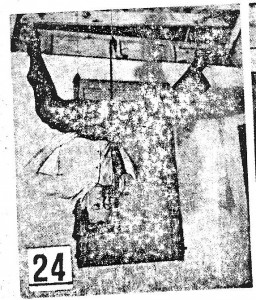
Position No. 24: In this attitude try balancing by the technique explained under figure 10, or even work up to 9 or 11. Once you get the “feel” of it, the slight motion of the free trapeze actually makes the balance easier! (The effect is not unlike rocking in a chair.)
On the Swinging Trapeze
Follow the same general plan of figures 19-20-22-23. Sit on the bar, work up a short swing, and at the end of the front swing go from 19 to 20. Then feel your way carefully through 22 to 23. You will soon learn to work with the swing of the bar and to utilize its movement to maintain control of your position.
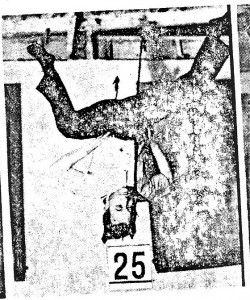
Position No. 25: Beginning with only a short swing, proceed to the hand-on-hips style illustrated, but try to hold the leg position of Figure 5 rather than that is shown here. (Actually I was woefully out of practice at the time of posing for these nineteen new photos, I did not get the quite the desired positions in figures 23 and 24, as well as 25—or very much of a balance in the last named.)
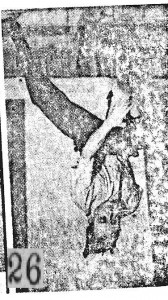
Position No. 26: But what if you lose your balance? Nothing! The supporting ropes are always in the same position with reference to your position, so, once you feel your balance moving past the recovery stage, you can grab rapidly—either 23 or 24 arm support—for the two ropes; then either try the balance again. Or come down and start anew. Figure 26 is not posed, but actually shows me the instant of realizing I’d fallen too far from attitude 25, returning my hands hurriedly but in plenty of time for safe recovery—with supporting strands.
What next? Juggling, spinning, swinging, circles, or fore-and-aft as well as swinging supporting a partner from a second trapeze below you (from figure 23), playing a musical instrument…..when you get this far you are just ready to learn some advanced trapeze.
If you want more information from Professor Paulinetti and Bob Jones on balancing on your HANDS then I highly recommend you check out their book The True Art and Science of Hand Balancing. It has this much detail plus so much more.
Read The Science of Head Balancing
Read Head-to-Head Balancing
