The back bridge, also known as gymnast bridge or hand bridge, is an amazing bodyweight exercise that can’t be replicated in any other way. When it comes to spine and shoulder strength and flexibility combined it just can’t be beat. In this article, I’ll be laying out some of the back bridge progressions that you can get started with, and a number of tips and tricks along the way.
The back bridge has a few similarities but is overall quite distinct from the wrestler’s bridge. Both are worth doing! For the basics of the wrestlers bridge, click here.
Getting Started – Hip Bridge
Depending on where you’re starting out you may be better off starting with the hip bridge than the back bridge. As the name implies, this exercise focuses on the hips.
Lay with your back on the ground and your knees bent so that your feet are flat on the floor, heels close to your butt. Press the feet into the floor to raise the hips up as high as they can go. This is great for dynamic flexibility of the hip flexors and involves the abs and low back too.
How to do a Back Bridge
If you can do the hip bridge no problem then you may be ready for the back bridge. I say may, because in addition to the spine, it takes shoulder and wrist flexibility to pull off. Lack of any one of these can stop you in your tracks.
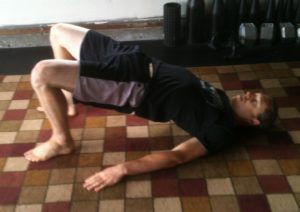
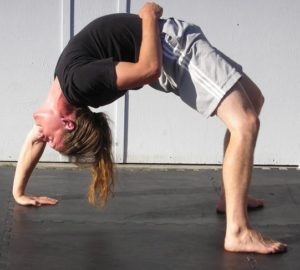
While there are advanced ways to get into the bridge like falling into it, aka a back bend, the simple starting position is on the ground. It’s the same as the hip bridge before, except that the arms are bent so the hands are flat on the ground next to your head. This picture shows what it should look like. From there you push up into the bridge. One name for this is the “reverse pushups” for obvious reasons.
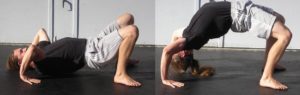
You’ll notice in the second picture there that the elbows aren’t locked out. When you’re starting out this is very likely to happen to a more or lessor degree. Inability to lock out the arms is due to lack of flexibility. Once again this can be an issue in the spine (and certain areas such as the thoracic more so than lumbar) as well as the shoulders or wrists.
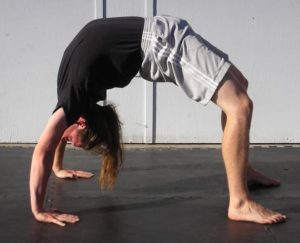
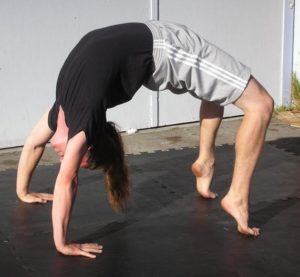
Ideally, you want to be able to push up into a full lockout. Then, holding for time is a good way to progress the back bridge. Shown here is pretty close to an ideal position where the legs and arms are perpendicular to the ground.
One way to make the back bridge a big easier is to raise up on the toes. As this gives you a few more inches of height less flexibility is needed across the rest of the body.
How to Progress withthe Back Bridge
You can do a number of things:
- Aim for a better form hold. Increased quality is one form of progression. First up is locking out the arms. Then you can work on moving the arms and legs closer to each other.
- Aim for a longer hold. Once you’re in your best bridge position hold for time. In the beginning this may be ten seconds. But with practice you can hold it for a minute or two or even longer.
- Aim for reps. You can do this by repping out the reverse pushups.
- Go more advanced with harder variations…
Advanced Back Bridge Progressions
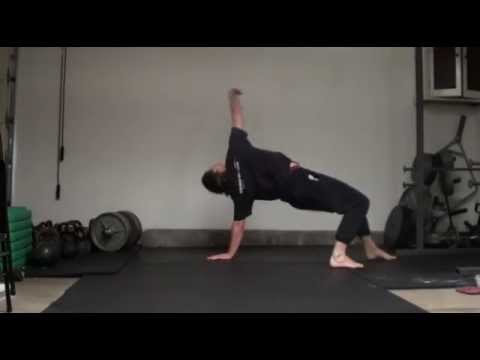
There are one arm variations:
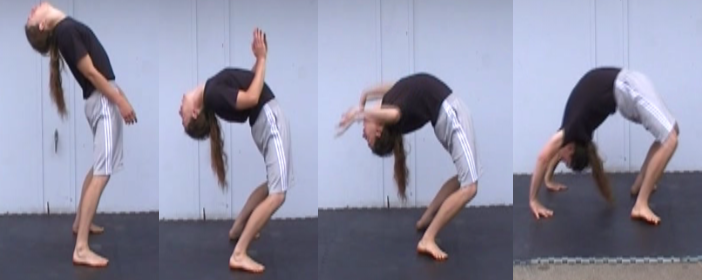
There are many dynamic moves that can be done from here such as the back bend, or falling into a bridge.
Or twisting into and out of a bridge on one arm:
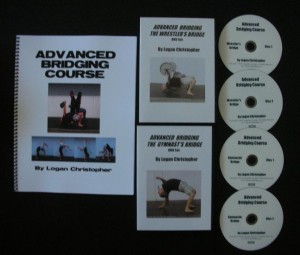
For much more information about bridging, including the wrestler’s bridge variations too, check out the Advanced Bridging Course, the most complete bridge training information ever compiled.
You can also find just the bridging book on Amazon here.
Bridging in all its forms is a mostly unknown way to train. There is nothing like it as far as the benefits it can deliver. For these reasons bridging deserves your respect and your dedication in training.